Flujo de trabajo de Texto a imagen
Explora el flujo de trabajo de texto a imagen en ComfyUI de SeaArt, desde añadir nodos como KSampler y LoRA hasta establecer parámetros y generar imágenes asombrosas basadas en tus prompts de texto.
1. ¿Cómo iniciar el flujo de trabajo de Texto a imagen?
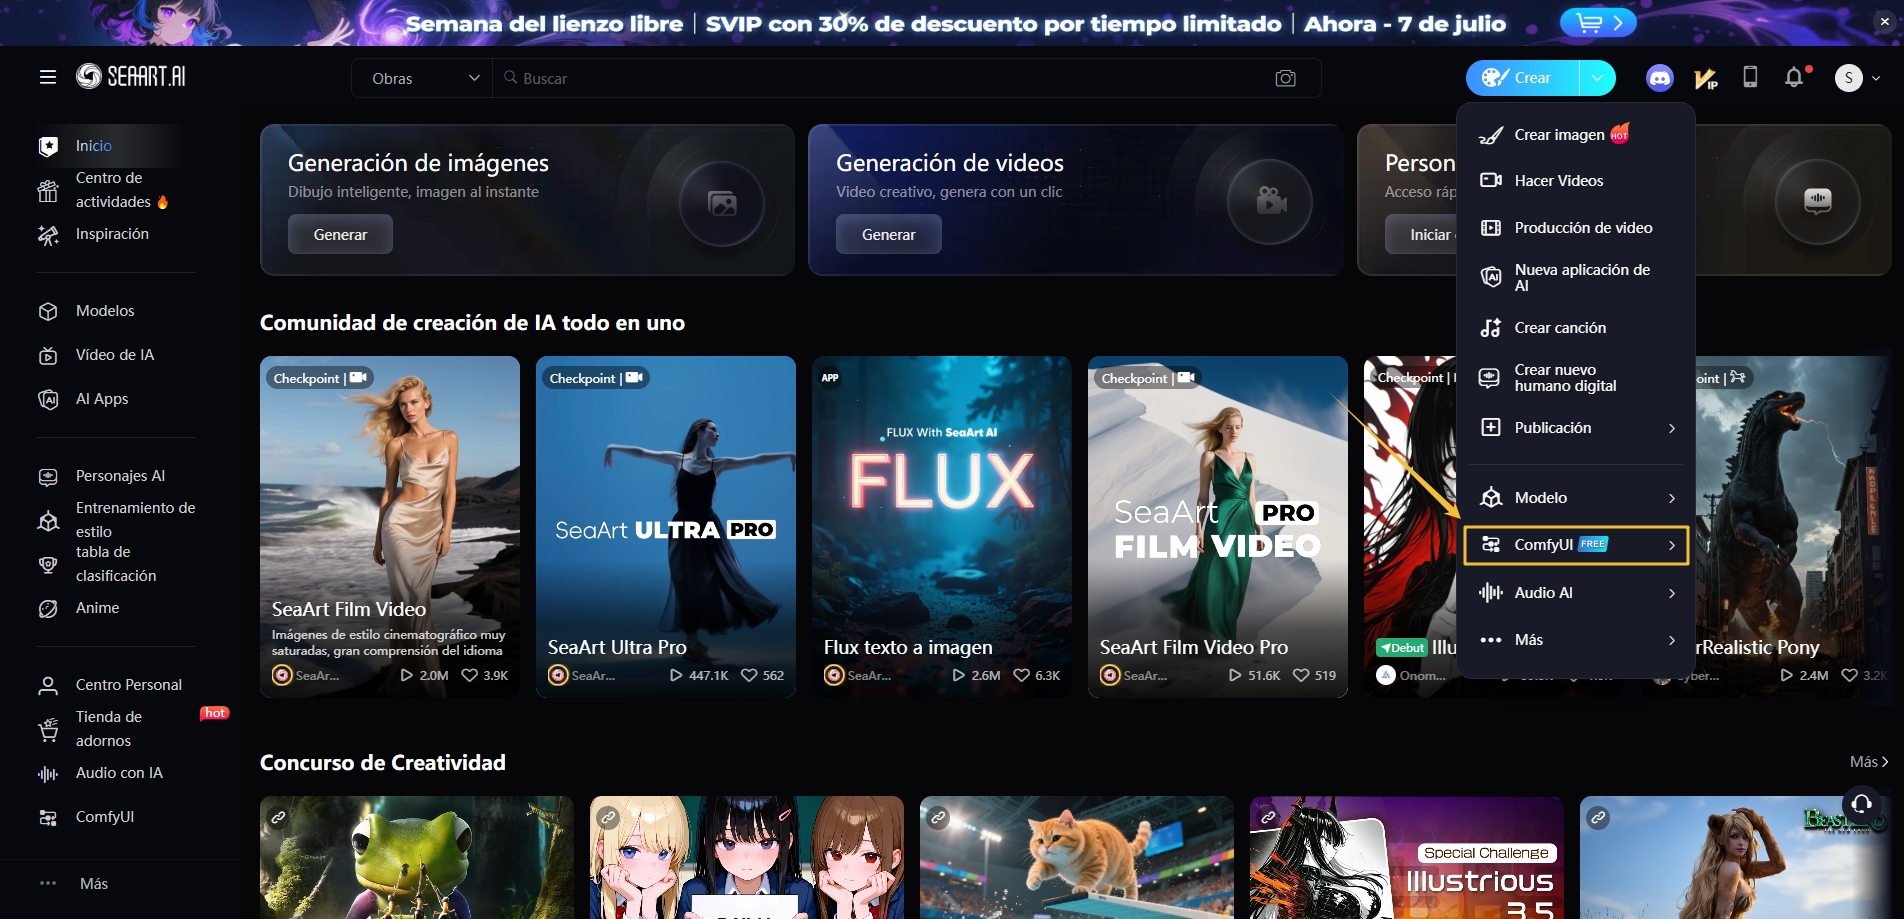
Paso 1. Haz clic en ComfyUI y crea un nuevo flujo de trabajo.
Paso 2. Añade el flujo de trabajo básico de Texto a imagen.
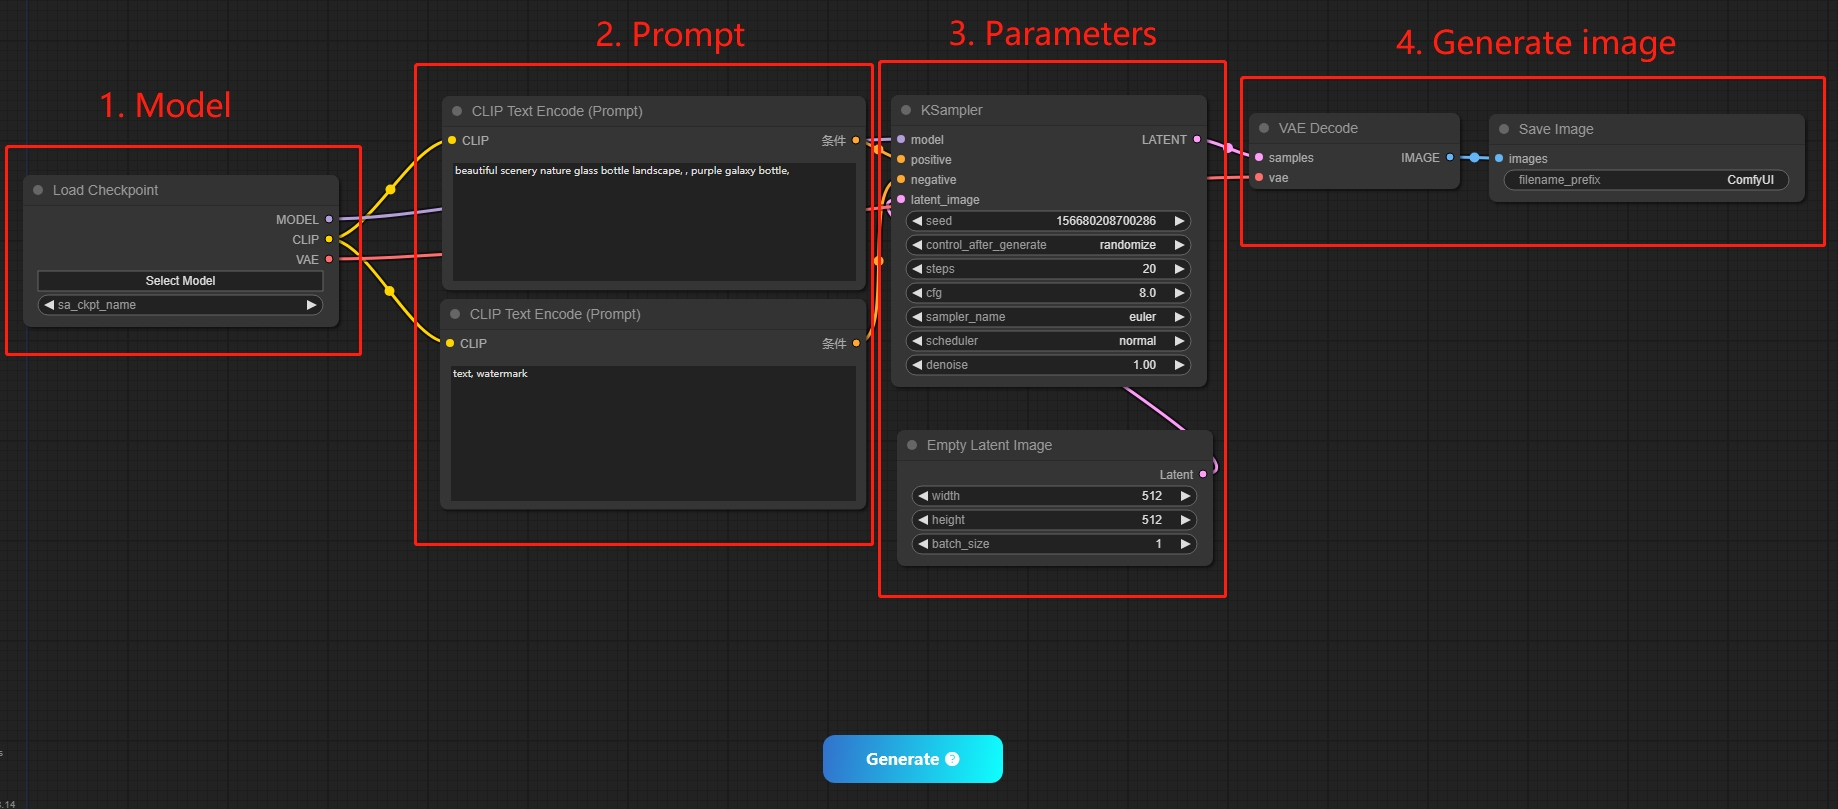
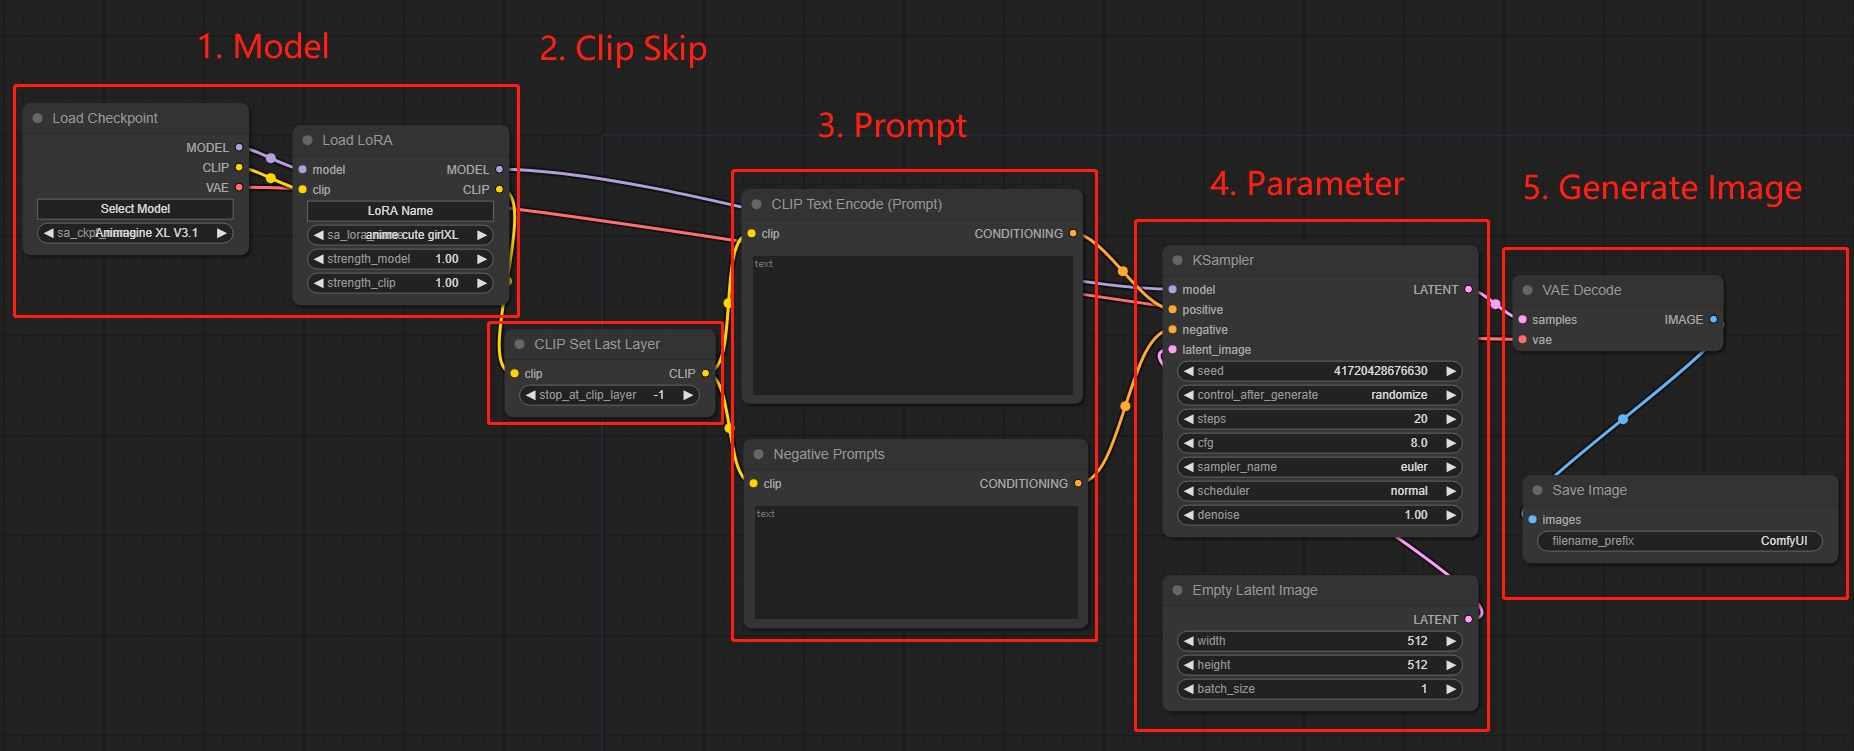
El flujo de trabajo en ComfyUI es similar al de Web UI:
Seleccionar un modelo → Introducir el prompt → Ajustar parámetros → Generar imagen
Parámetros
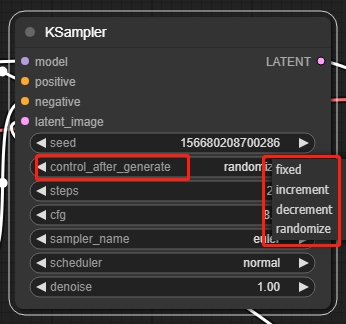
control_after_generate: controla la generación de la semilla
fixed: fija la semilla
increment: suma 1 a la semilla existente
decrement: resta 1 a la semilla existente
randomize: genera una semilla aleatoria
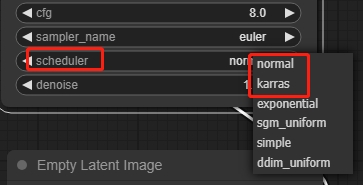
scheduler: generalmente se elige entre normal o Karras. denoise: que indica la intensidad de la reducción de ruido en la generación de imágenes, cuanto mayor sea el valor, mayor será el impacto y el cambio en la imagen.
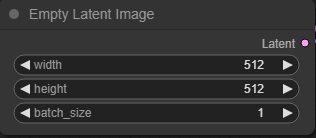
Tamaños recomendados:
SD1.5: 512512
SDXL: 10241024
2. ¿Cómo añadir un nodo?
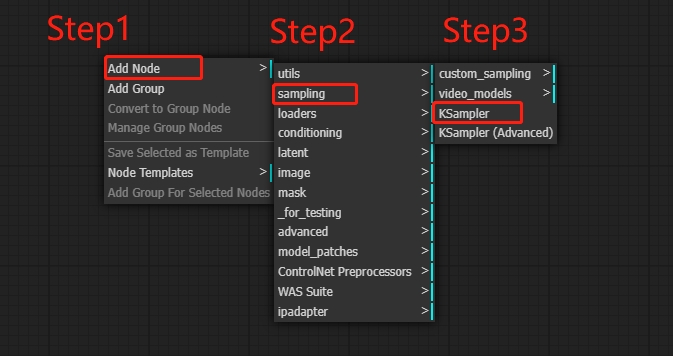
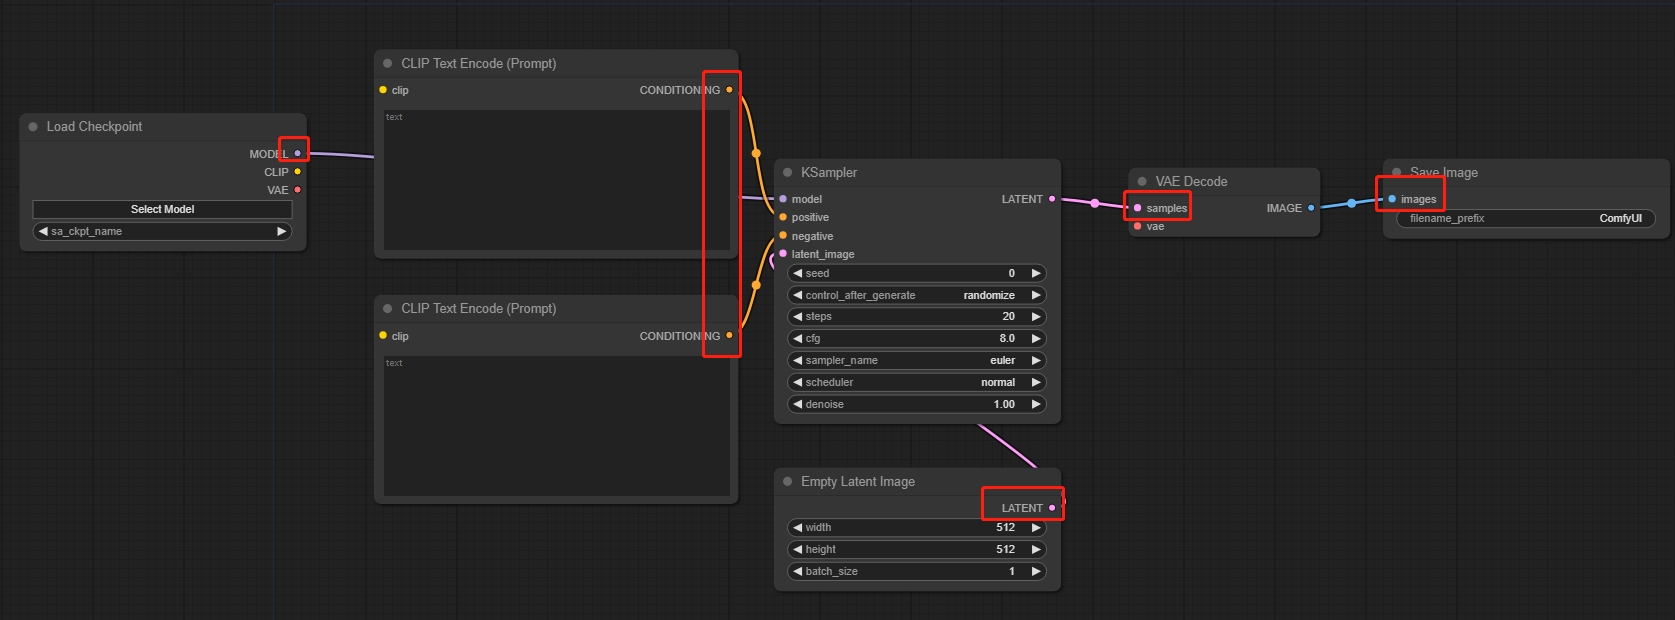
2.1 Añadir KSampler
Primero, agrega un nodo principal: KSampler
Clic derecho: Añadir nodo → muestreo → KSampler
2.2 Extrae el nodo
Luego extrae el nodo del muestreador y añade los nodos correspondientes:
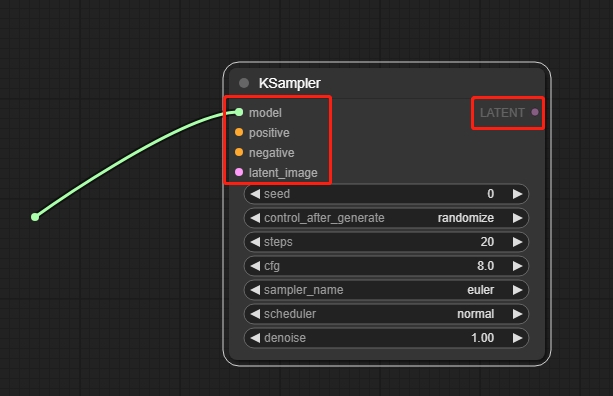
model → CheckpointLoaderSimple
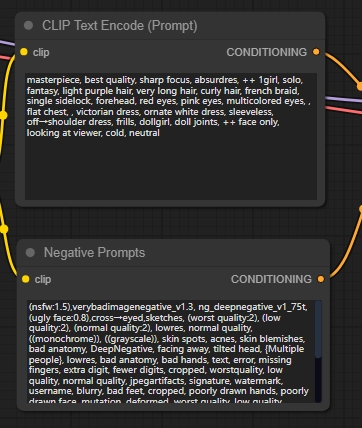
positive → CLIPTextEncode
negative → CLIPTextEncode
latent_image → EmptyLatentImage
LATENT → VAEDecode
IMAGE → SaveImage
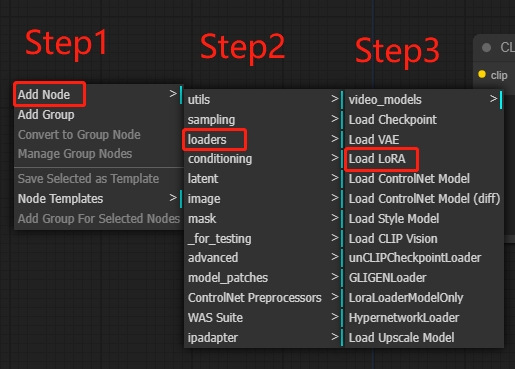
2.3 ¿Cómo añadir LoRA?
Loaders: se utilizan principalmente para cargar el modelo de difusión, incluyendo el modelo base y LoRA.
Añadir Node→loaders→Load LoRA
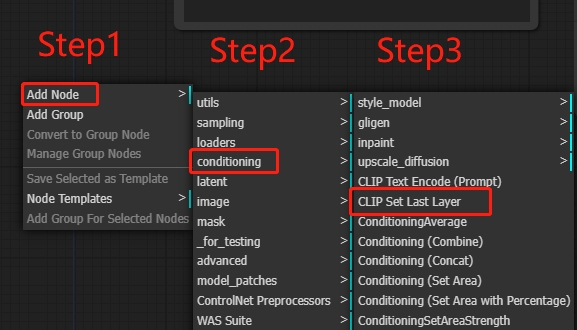
2.4 ¿Cómo añadir Clip Skip?
Conditioning: guían al modelo de difusión para generar resultados específicos, e incluyen elementos como Prompt, ControlNet, Clip Skip, entre otros.
Se recomienda añadir Clip Skip para controlar las capas que se omiten, lo cual ayuda a ajustar los detalles finales de la imagen.
Añadir Node→conditioning→CLIP Set Last Layer
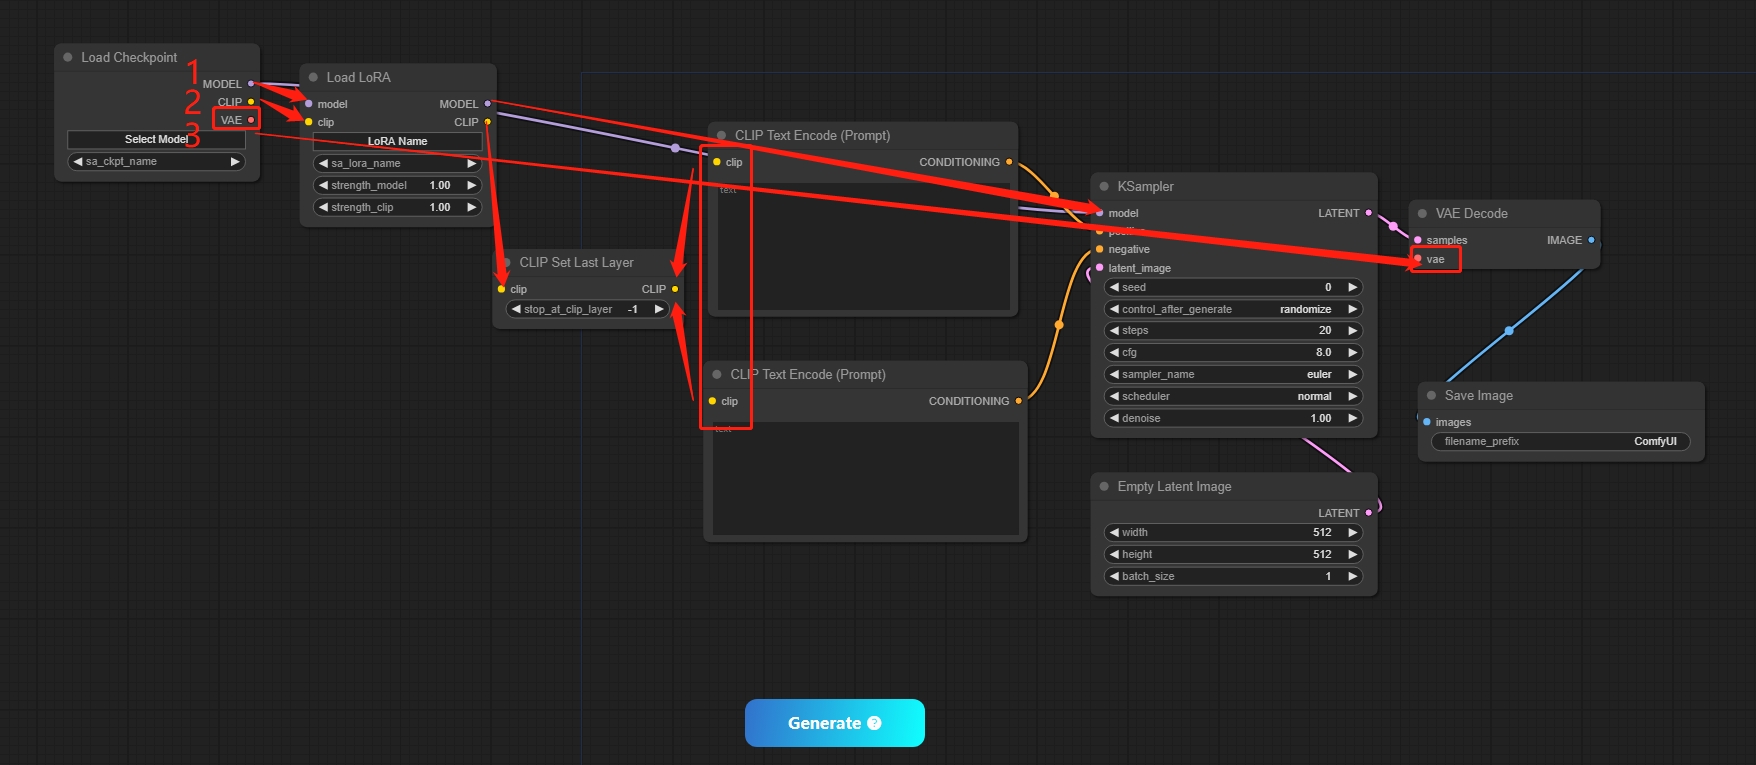
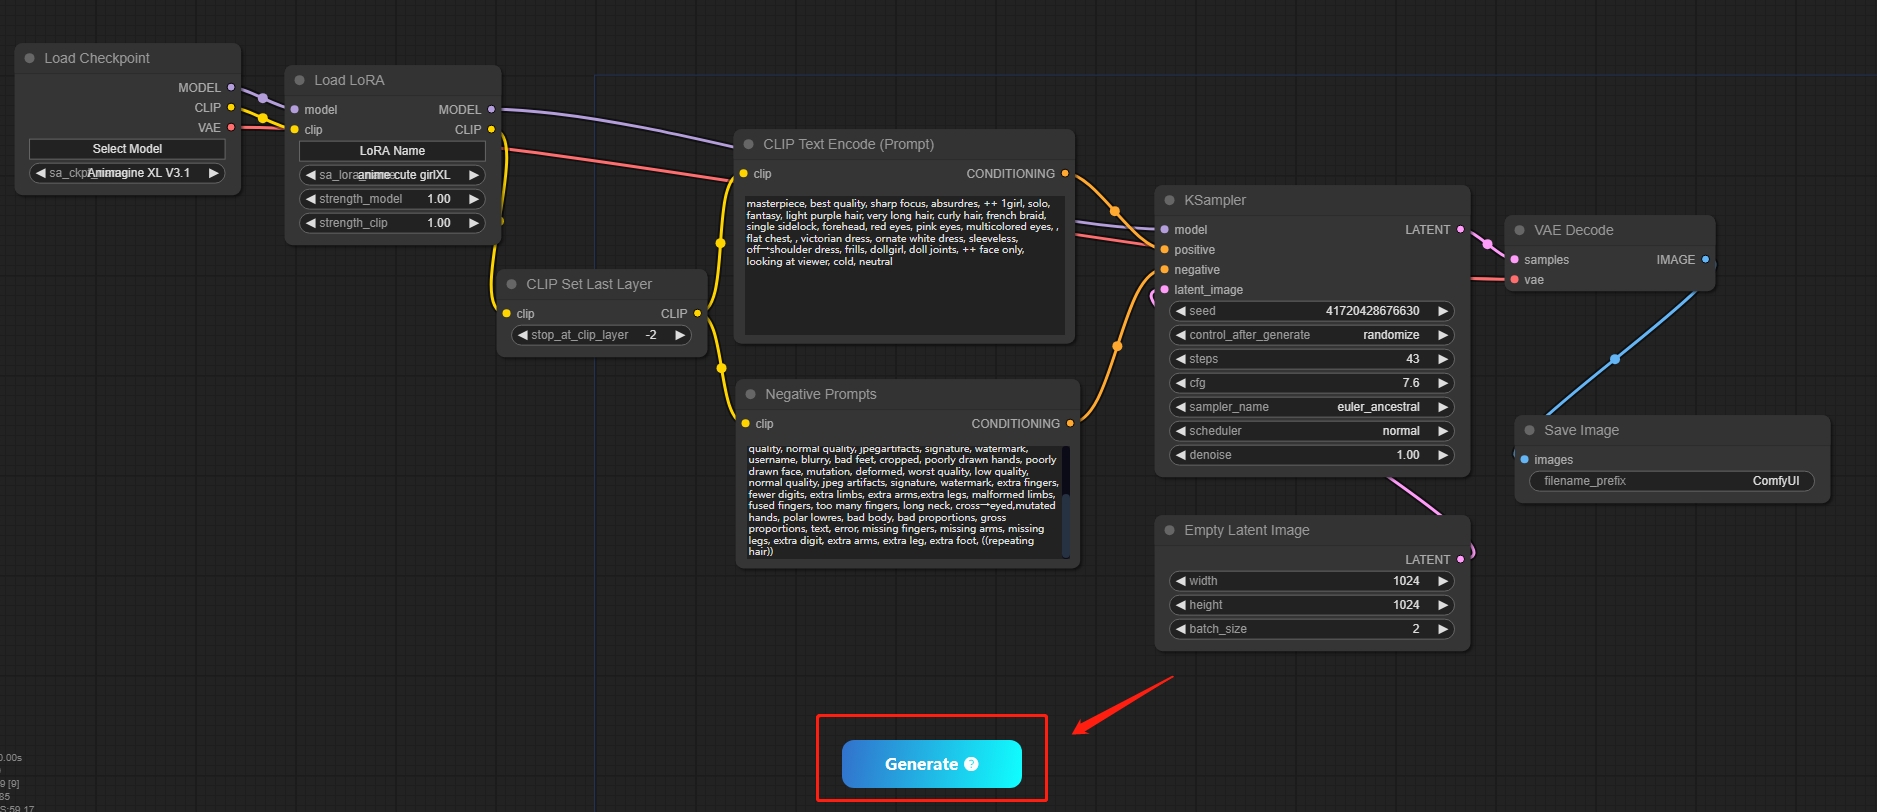
2.5 Conectar los nodos
Después de añadir nodos, es posible que muchos de ellos aún no estén conectados. Es necesario conectarlos en orden según la secuencia y los colores coincidentes.
Checkpoint→LoRA→Clip Skip→Prompt→KSampler、Empty Latent Image→VAE Decode→Save Image
3. Iniciar la generación de Texto a imagen
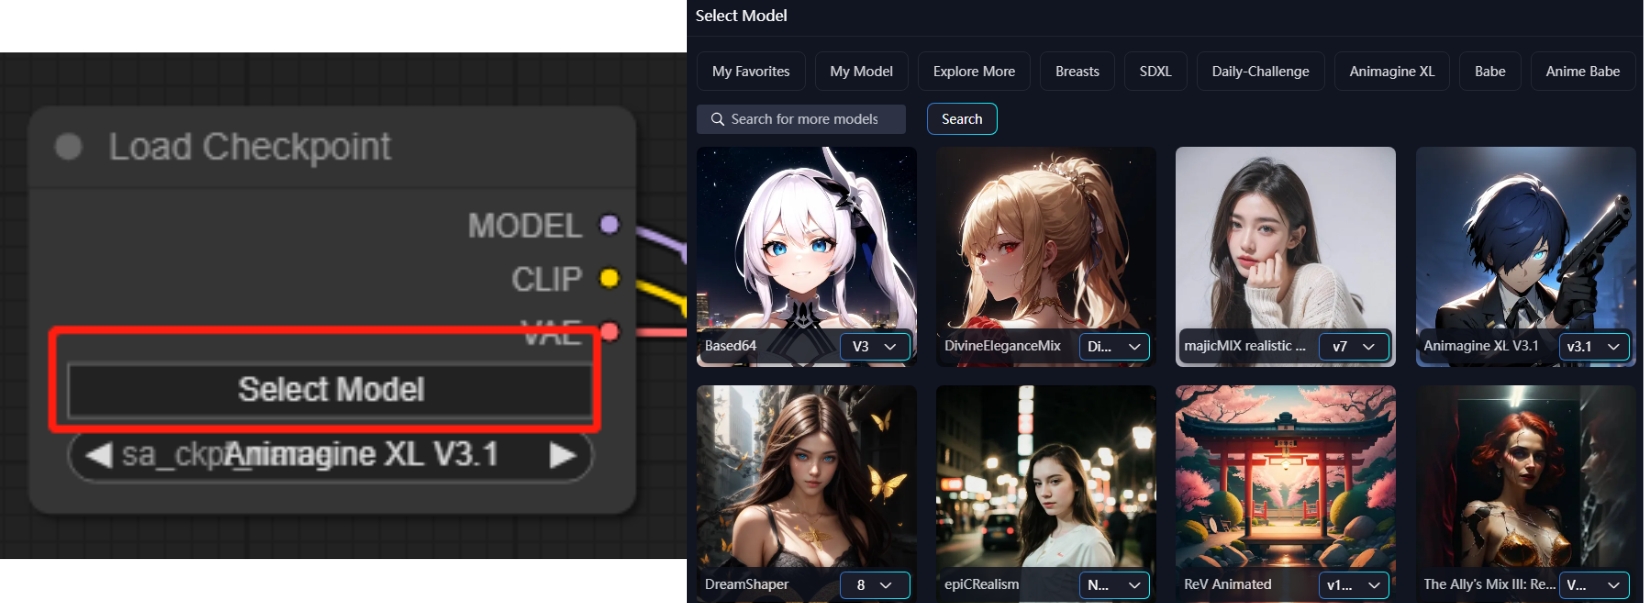
3.1 Elije un Checkpoint
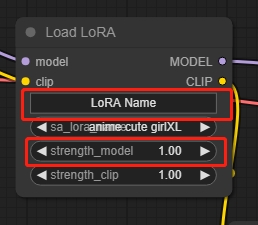
3.2 Selecciona LoRA y ajustar los pesos
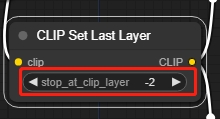
3.3 Configura Clip Skip, normalmente se recomienda fijarlo en -2
3.4 Ingresa el prompt de texto
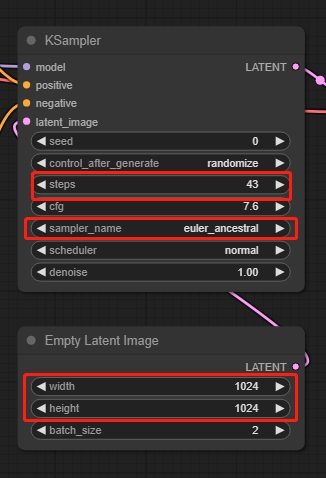
3.5 Configura los parámetros necesarios
El modelo elegido es el SDXL, por lo que hay que ajustar los pasos de muestreo a unos 40 y el tamaño de la imagen a 1024*1024.
3.6 Haz clic en "Generar"
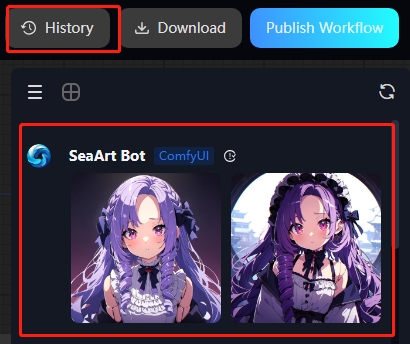
3.7 Vea los resultados